ArtEngine provides a set of painting tools that can be used when working with nodes like Mask Paint.
These tools allow you to paint directly on top of your textures and materials to create grayscale masks from within ArtEngine.
The settings for each of these tools can be modified via the Tool Options window. If you cannot see this window, you can navigate to Window > Tool Options in the Menu bar to bring it back.
Brush tool
The Brush tool lets you paint white values as a mask on top of your Bitmap or Material. The default shortcut to access this tool is B.
Eraser tool
The Eraser tool allows you to remove what you’ve painted with the Brush tool. The default shortcut to access this tool is E.
Painting shortcuts
When using painting tools, you have access to the following shortcuts which can help speed up your workflow.
| Name | Shortcut | Description |
|---|---|---|
| Brush tool | B | Activate the Brush tool. |
| Eraser tool | E | Activate the Eraser tool. |
| Constrain to straight line | SHIFT + LMB and drag | Paint a straight line between the last brush stroke and the new one. |
| Straight line between points | SHIFT + LMB | Paint a straight line between the last brush stroke and the new one. |
| Change brush size | CTRL + RMB and drag | Increase or decrease the brush size. |
Tool Options
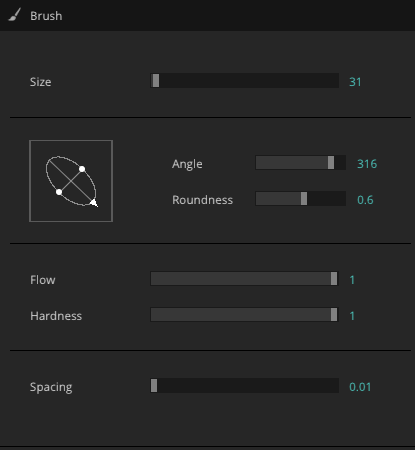
When you select one of the painting tools available in ArtEngine, its properties can be modified in the Tool Options panel.
| Property/Setting | Description |
|---|---|
| Size | Set the brush size for the selected painting tool, in pixels (minimum: 1, maximum: 2048). |
| Angle | Set the angle of the brush stroke in degrees. This is useful in conjunction with the Roundness modifier to create a flat brush and orient it to your liking. |
| Roundness | Set the roundness of the brush stroke (minimum: 0, maximum: 1). Smaller values create a flat looking brush, whereas a value of 1 creates a completely round brush stroke. |
Angle/Roundness widget | You can use this widget to visually modify the Angle and Roundness properties of your brush by dragging on the control points of the brush stroke. |
Flow | Change the amount of paint flow in the brush (minimum: 0, maximum: 1). This lets you put down more transparent brush strokes which, when laid over each other, will increase in opacity. |
Hardness | Change the hardness of the brush stroke (minimum: 0, maximum: 1). Smaller hardness values produce a stroke similar to an airbrush, with soft edges. |
Spacing | Change the spacing between individual brush stroke stamps when painting. (minimum: 0.01, maximum: 2). A lower value produces a smoother brush stroke. |