Seam Removal
- Alice Hinton-Jones (Deactivated)
A demonstration of Seam Removal results.
Description
The Seam Removal node can be used to remove texture seams from any Bitmap or Material, making it easily tile across a mesh without breaking the illusion of a continuous surface.
Usage
General workflow
To use Seam Removal:
- Add the Bitmap or Material from which you want to remove seams onto the Node Graph.
- Create a new Seam Removal node on the Node Graph. It can be found in the Smart Mutation category of the Node Library.
- Connect the Bitmap or Material to the first input port of the Seam Removal node.
- Adjust the Seam Borders property to match the part of the texture where you want Seam Removal to occur. You can do this by manually inputting the value in the Properties window, or by using the widget overlay in the 2D Viewport. To use the widget, make sure to bring the node into the 2D Viewport first.
- Execute the node.
- View the result of Seam Removal in the 2D and/or 3D Viewports. You can also preview how the output Material/Bitmap is tiling by enabling the Tile Texture in Viewport button in the 2D Viewport interface.
Using an Ignore mask to remove unwanted features from the input image
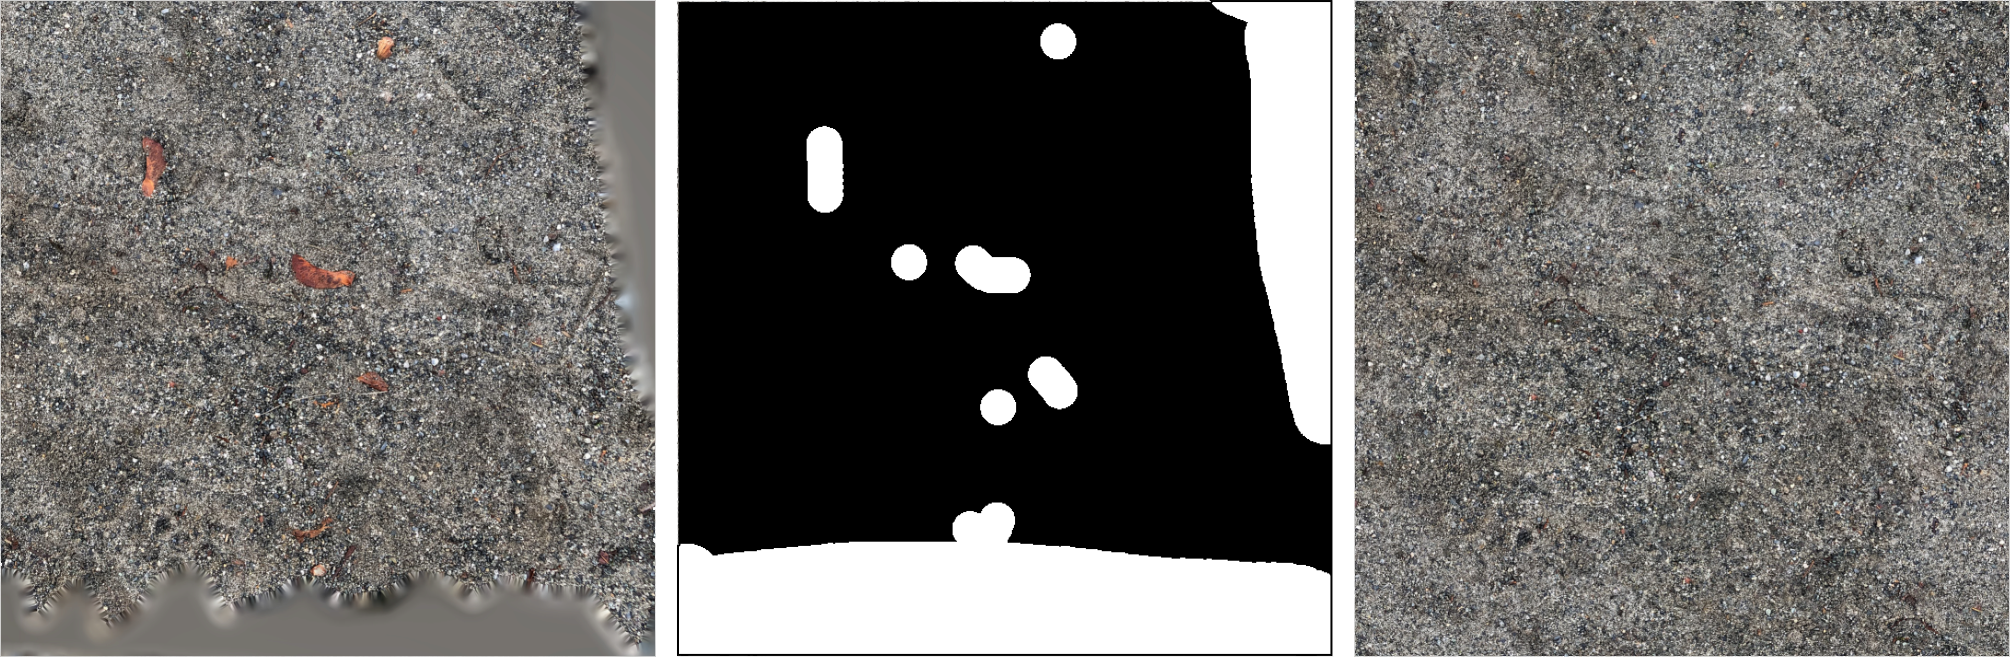
Original input (left), Ignore mask (middle), Seam Removal output (right).
Similarly to the Mutation node, you can use an additional black and white mask with the Seam Removal node in order to remove parts of the input image from the output result.
You can use this feature to remove unwanted artifacts, or unique elements which make the pattern obvious when tiled (for example, leaves). Alternatively, you can also use it to create new, unique tiling materials.
On an Ignore mask, white areas indicate parts of the image that should be removed, and black indicates those that should be preserved.
To use an Ignore mask with Seam Removal, follow these steps:
- Create a black and white mask to use with your input texture. You can use the Mask Paint node for this, or import an additional Bitmap with the mask.
- Connect the mask to the Ignore port on the Seam Removal node.
- Execute the Seam Removal node again and view the result.
Using Structure Guide to preserve structural integrity of the input
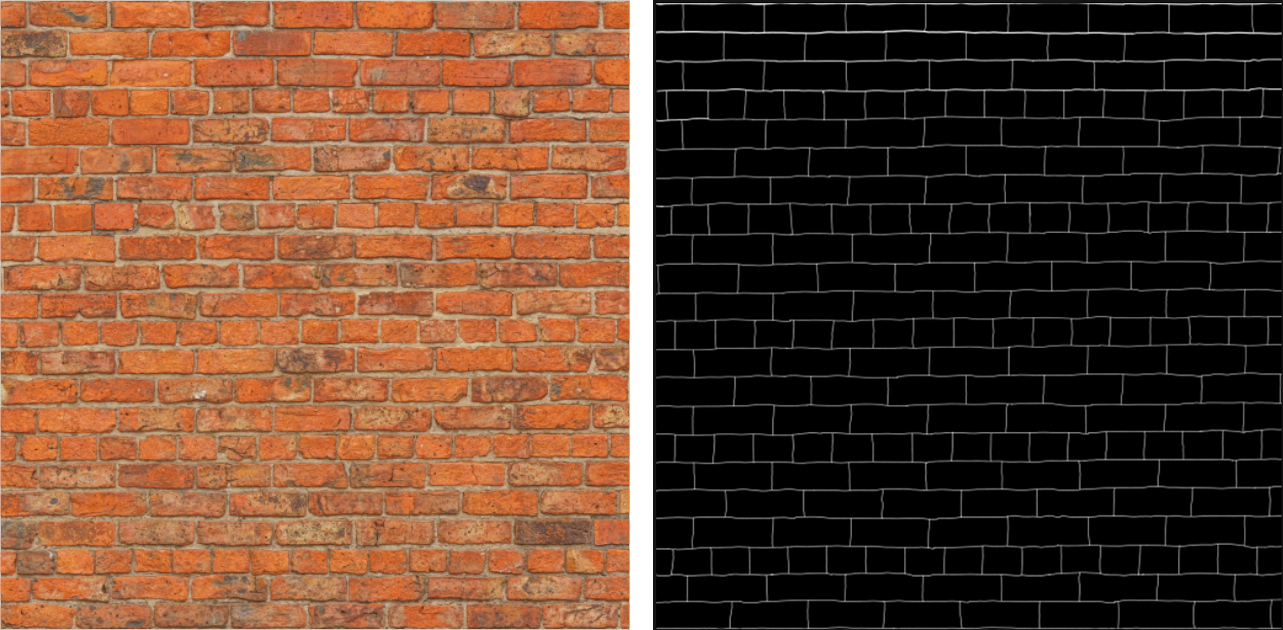
Input image (left) and the corresponding Structure Guide mask (right).
Some input images have a structural pattern - such as bricks, cobblestone, bark, and others. For such inputs, it is beneficial to use an additional Structure Guide mask if you wish that structure to be preserved correctly during Seam Removal.
A Structure Guide is a black and white mask, where the white indicates parts that should be preserved during Seam Removal. Note that sometimes you might achieve better results by inverting the mask.
Here are the steps to using a Structure Guide with Seam Removal:
- Create a black and white mask to use with your input texture. You can use the Mask Paint node for this, or import an additional Bitmap with the mask.
- Connect the mask to the Structure Guide port on the Seam Removal node.
- Execute the Seam Removal node again and view the result.
Node Reference
| Node category | Smart Mutation |
|---|---|
| Node execution style | Manual |
Ports
| Input Name | Input Type | Description |
|---|---|---|
| Bitmap / Material | Bitmap / Material | The input BItmap or Material from which you want to remove seams. |
| (Optional) Ignore | Bitmap (Mask) | A black and white mask, where white defines parts of the input image that should be removed from the output of Seam Removal. |
| (Optional) Structure Guide | Bitmap (Mask) | A black and white mask which the node uses as a guide to retain the original structure of the input image. |
| Output Type | Description |
|---|---|
| Bitmap / Material | The resulting Bitmap or Material with the seams removed. |
Properties
| Property/Setting | Description |
|---|---|
| Input Type / Output Type | These properties control whether the input and output of the node is a Bitmap or a Material. These properties change automatically depending on the input type connected to the first port. |
| Seam Borders | The width of the seam removal border along the x-axis and y-axis, as a percentage of the input texture resolution. Use the Link button on the left if you wish to adjust the x-axis and y-axis values independently of each other. You can also adjust the Seam Borders visually by using the widget overlay in the 2D Viewport. |
| Border Color | The display color of the widget overlay which represents the seam removal area in the 2D Viewport. |
Border Opacity | The opacity of the widget overlay which represents the seam removal area in the 2D Viewport. |
Seed | The seed value that the node uses to randomise Seam Removal behavior. You can modify this value by hand, or click the New Seed button to generate a new random value. This property only accepts numeric values. |